Pools and spas are supposed to be about fun and relaxation, not stress. That’s why it’s a sinking feeling to notice a gradual (or sudden) drop in water level, indicating yours might have developed a leak. If it’s indeed what is happening, don’t panic because we offer pool leak repair in Oahu.
First, want some good news about pool leaks? More than 90 percent of them turn out to be simple repairs that our technicians can handle in a routine service call. Or, if you can spot the problem yourself, it may be something you can correct easily on the spot. Whichever way it goes, you’ll have it solved.
If you take a look on your own and don’t see the problem, we’ll arrive with leak detection equipment. We can pinpoint the source quickly and make the needed repair.
How Can You Tell if a Pool or Spa is Leaking?
 If you notice a change in water level, is it a leak or ordinary water loss from evaporation, splashing (have your kids been doing cannon balls?), or backwash wastewater? Many things can decrease your pool’s water level; the question is whether it’s natural or indicates a problem.
Here’s a rule of thumb: The threshold to suspect a pool leak is a water line drop of more than two inches per week.
If you’re adding more than two inches of water to your pool each week, there’s a good chance you have a leak. How can I check accurately? Mark the waterline with tape or a marker and remember the date. Check for leaks DIY (see list below) or call a pool service if it drops more than two inches in seven days.
What Causes Pools to Spring a Leak?
Pools are designed and built to hold water, but their water tightness can deteriorate over time. Sealants can shrink or crack, and plumbing lines can come loose, liners or other parts may wear out. The humidity and salt air in our tropical climate can be corrosive and speed up the deterioration of various elements.
Leaks can also occur in accessories like filtration systems and circulating pumps. Regardless of where the water loss is happening, getting it repaired as quickly as possible is best. The reasons why? To conserve water, prevent the release of chemicals, and protect the structure. Unchecked leaks can wash away the soil that supports the pool and deck.
12 Tips How to Find a Pool Leak DIY
1: DOES WATER LEAK WITH THE FILTRATION SYSTEM TURNED ON?
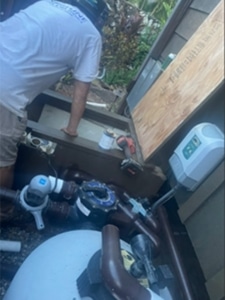 Because it involves water pressure, the first place to look is the pump. Turn the pump on and check the “return side” plumbing because it is pressurized. These are the lines that come after the filter pump.
Be alert to any size leak. Spraying gushers are the easiest to notice, but steady drips also need repair. Then take a look at the backwash line outlet. If water is running out consistently, it’s an issue. Each inch of water level in your pool equals hundreds of gallons, so any of these things are serious.
Lastly, check areas around the pool, especially downhill spots, for puddles where underground leakage is surfacing. Also, be alert to wet or squishy spots on your lawn near your pool’s plumbing returns.
2: CAN YOU FIND LEAKS WHEN THE FILTER PUMP IS TURNED OFF?
Try turning the filter pump off and see if anything changes. If you notice a steady drip you hadn’t seen before, it could be a suction-side leak. They are disguised with the pump on because it creates a vacuum effect on the suction side and draws in a small amount of air at the leak site that holds the water in.
As soon as the pump is switched off, a leak reappears at the site of the void. Other signs of a suction-side leak can be air entering the pump basket (if you can see into it), bubbles coming out of the return lines, or air build-up in the filter system’s tank.
3: DOES THE LEAKING STAY THE SAME WITH THE FILTER ON AND OFF?
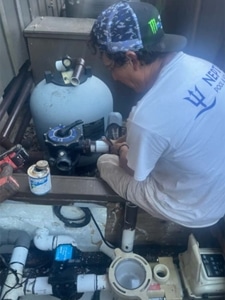
A continuous pool leak doesn’t automatically rule out plumbing leaks, but it raises questions about cracks in the concrete shell or tears in the pool liner. If there are tiny tears or hairline cracks, they might not be easy to spot and will take some detective work.
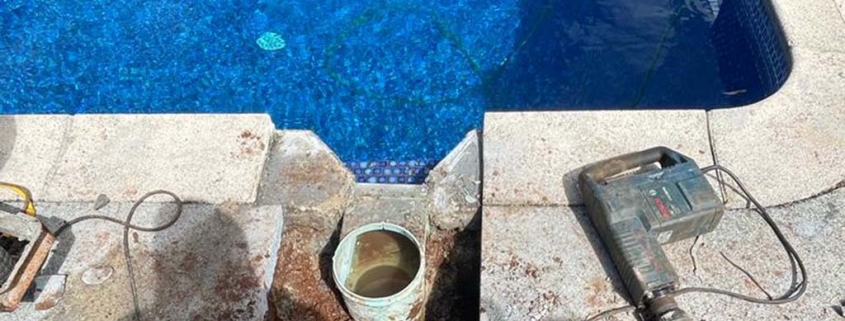
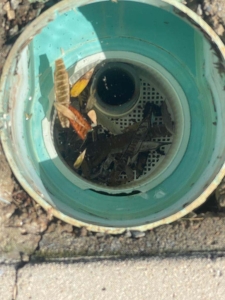
Your best bets are, to begin with, an up-close review of the tile line and then look inside the skimmers. The most common pool leak we repair at Neptune Pool & Spa is a plastic skimmer separated from the concrete pool shell. Correcting it is a minor fix involving pool putty and water-tight sealant.
If you notice a crack in the shell, you need to turn off the pump and try test dye along the gap. If the dye is sucked into the void, it indicates a leak.
Our pool repair technicians also frequently discover leaks involving underwater lights. Water can escape into the conduit (pipe holding the wires) between the light and the electrical junction box. Stopping it requires a repair with a cord stopper, pool putty, concrete, or sealant tape.
4: DO YOU SEE A LEAK AT THE EQUIPMENT PAD?
We discussed the plumbing lines going to and from the pump earlier, but what about the equipment? Check carefully around the filtration system, pump, heater, and connected valves. Besides looking at each element, look at the ground below and see if you notice water.
While you’re there, you can switch the pump on and off and see if either produces a more visible leak.
Also, keep in mind that a tiny drip or drop isn’t the source of a significant pool leak. Given the water volume in a pool, you’re looking for something like a noticeable trickle, at the least.
5: DOES THE WATER LOSS STOP AT A CERTAIN POINT?
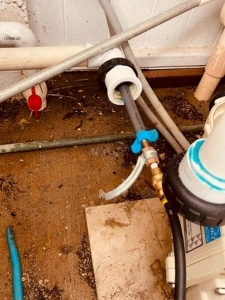 When your pool leaks/loses water down to a certain point and stops, it’s time to check the skimmers. If you have a skimmer valve, close it. Allow the water to drop below the skimmers.
At that point, our pool technicians would run a submersible pump on the bottom main drain. If the water level keeps dropping, it’s only the skimmers unless there are multiple leaks. Using a submersible pump is also crucial to prevent hazards or pump damage.
Other things to try in this situation are pool leak detection dye anywhere you notice a suspiciously cracked or deteriorated spot in the shell. If you see an area where fragments have been drawn into the imperfection, it’s a sign you may have found the leak.
If the water level drops to a step, underwater light, or fitting, take a close look. It’s likely the culprit. You can also double-check it’s not a plumbing leak by turning off the pump and plugging the drain, skimmers, and return lines.
6: DO YOU NOTICE ANY WET SPOTS NEAR THE POOL?
Once you’ve examined the mechanical equipment and visible areas of the plumbing, walk the perimeter of your pool. Check for wet spots in the grass and any eroded areas.
If there is an incline near your pool, walk down the hill and see if you notice water seeping from the soil.
7: FINDING LEAKS IN VINYL-LINED POOLS
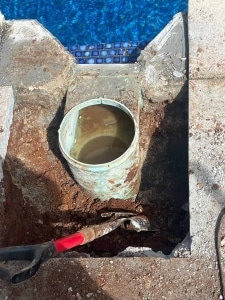 Vinyl-lined pools can have different kinds of leaks than you have with concrete. First, you must scout for tears or separations anywhere in the liner, including the usual leak-prone areas – drains, skimmers, returns, steps, etc. Also, watch for corners where the liner is stretched more than usual.
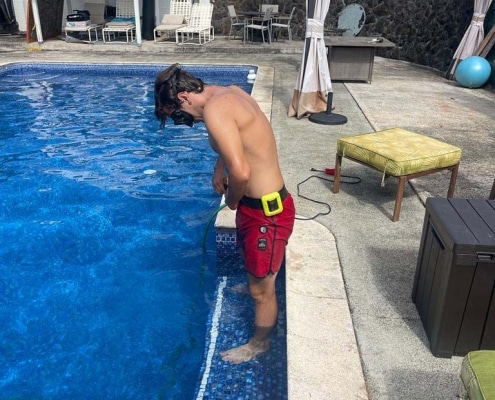
A small tear on the pool bottom or side well below the water line may take an underwater inspection to locate. Be prepared to spend time underwater wearing a mask to look.
Consider also the lifespan of a pool liner. In our Hawaiian tropical climate, the intense sun can speed up deterioration and lead to tiny pinhole leaks. If your liner is seven years or older, you may begin having leaks routinely and need to consider replacing it.
In general, leaks arising from cuts in a vinyl pool liner can be stopped with patching or vinyl sealant. Our experienced Neptune technicians can help if you’d prefer to have your pool repaired by a professional. We recommend using transparent vinyl patching material or a piece of the original liner if available. Better pool installers will leave extra cut-out pieces with you when they replace a liner.
Several vinyl products for sealing pool liners are on the market that work well. They’re sold in tubes and can be smoothed on with tools or carefully with your finger in some cases.
8: YOU CAN USE A BUCKET TO DETERMINE THE LEAKAGE RATE
You can do some simple things to monitor and confirm drops in pool water level, and one popular one requires only a bucket. Place it on a pool step and add enough water so that the level inside the bucket matches the pool water around it. Make a mark at the water line both inside and outside the bucket.
Return in one to two days and compare the water level in both. If no water loss other than natural evaporation occurs, the water level will be the same inside and outside the bucket. If the pool water is lower, it confirms you have an active leak.
9: HOW TO DETECT UNDERGROUND LEAKS IN POOL PLUMBING
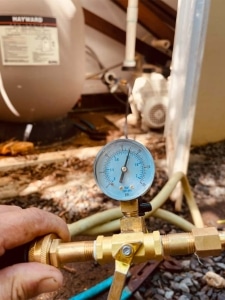 Luckily, it’s relatively unusual for pool leaks to occur in underground plumbing lines. Pool owners dread them because repairs are costly and require digging up your yard or breaking through the deck. But despite the rarity, if you have a tough-to-find leak, you’ll need to solve it. Some can be repaired by working through a skimmer or under a deck without significant excavation.
Ruling out leaks in underground pipes is straightforward. You shut off the pump and plug the lines. If the leak continues and the water line drops, it rules out the plumbing. On the other hand, if the pool holds water with the lines plugged, you unplug them one at a time until you find the one that lets the leak resume. It’s also possible they will only leak when pressurized with the pump on.
If there is a strong indication an underground pipe is leaking, the final confirmation comes with a pressure test. It requires the right equipment, which can include adding air to the line and listening with headphones to determine the leak’s location. It minimizes any excavation and disruption if necessary.
When underground pool plumbing repairs are needed, it usually requires no more than a three-foot square excavation. It’s unusual for an entire pipe to need repair; if one does, the simplest solution is to replace it.
10: CHECK FOR CONCRETE POOL LEAKS AT THE TILE LINE
There are a couple of possibilities when concrete pools leak at the tile line. Most often, there’s a leak inside a skimmer at that level.
It’s possible but unusual for a crack to occur behind the tile, and when one does, it nearly always cracks the tile. If one does happen, they can be cleaned, dried, and patched with the right products.
11: LOOK FOR CRACKS IN THE CONCRETE SHELL
If you notice surface cracks in your concrete pool or on your pool steps, they generally don’t cause leaks. You want to check for more significant or deeper cracks where leaks may exist.
The best approach is to try dye testing to verify whether water is escaping. If it is, the proper repair depends on the size of the crack. You can take care of small ones with plaster mix, silicone sealant, or pool putty. Broader or longer gaps need a dual-stage process—first injected sealant and then plaster.
12: ARE YOUR SKIMMERS THE CULPRIT?
Concrete Pool Skimmers:
In the lifespan of an in-ground concrete pool, leaks will likely develop around the skimmers and need repair or resealing. It’s caused by routine expansion or contraction of the pool or deck that creates pressure and breaks the skimmer seals. There are three joints that need to be kept sealed – both sides and at the front toward the bottom.
The best leak test method is turning off the pump and performing a dye test in all the potentially affected areas. If the dye shows water being drawn into the joints, there is a leak, and reseal as needed. You can use pool putty for temporary repairs, and to solve the problem permanently, patching the plaster is the preferred method.
Vinyl-Lined Pool Skimmers:
Skimmer leaks in vinyl-lined pools routinely occur around the wall seals. The first repair step is to tighten the skimmer faceplate screws as much as possible. If that doesn’t solve the leak, it’s time to replace the skimmer faceplate gaskets. Dye testing can confirm the existence of leaks or show they have been resolved. Always do it with the pump turned off.
The 12 steps above cover virtually any type of pool leak. If you cannot find and repair the leak on your own or don’t have the time, our Neptune Pool & Spa technicians can help. Please call us at 808-265-1823.

